Organization
The Organization page (/org) manages the shared workspace that every member of your org interacts with — its name and branding, who belongs to it, what restricted users are allowed to do, and how new people join. It is the counterpart to the personal Profile page, which manages settings that belong only to you.
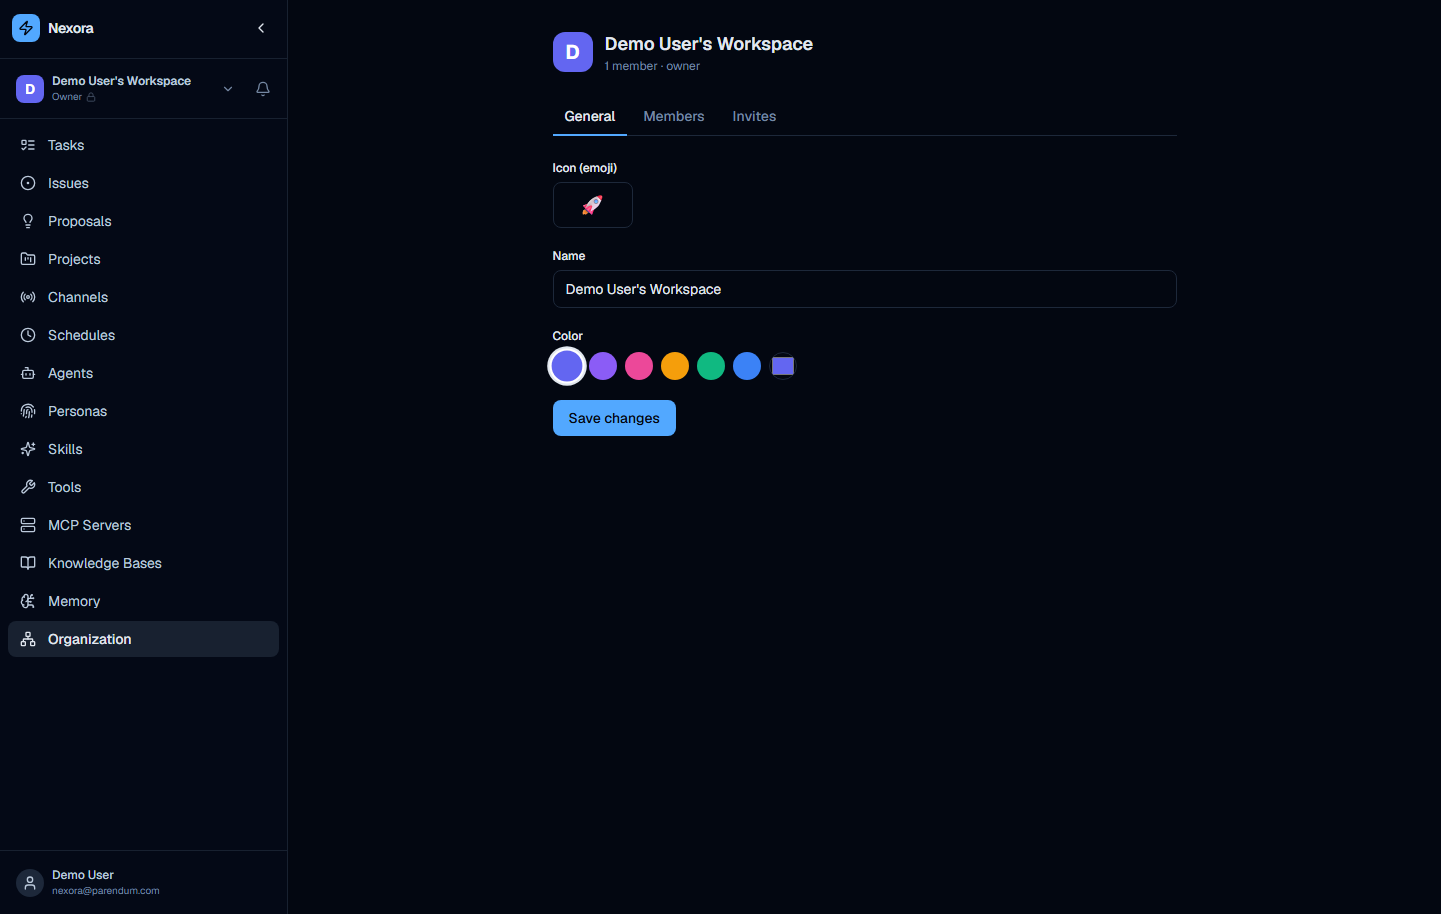
The organization page is accessible to all members but editable only by Owners and Admins. Admins see four tabs (the Groups tab is admin-only):
| Tab | Purpose |
|---|---|
| General | Organization name, icon, and accent color |
| Members | View and manage current members and their roles |
| Groups | Permission groups — restrict what members and viewers can see and do, and cap their usage (admins only) |
| Invites | Send invitations and manage pending invite links |
General tab
Organization icon
Like the user avatar, the organization icon is an emoji. The screenshot shows the rocket emoji (🚀). Click the emoji picker to change it. The org icon appears in the sidebar org switcher and on team-facing surfaces.
Organization name
An editable text field showing the current name (e.g. “Docs User’s Workspace”). This name appears in the org switcher dropdown and in shared contexts visible to all members.
Accent color
Six preset color swatches let you pick an accent color for the organization — Indigo, Violet, Pink, Amber, Green, and Blue — plus a native color picker for any custom color.
The accent color is used in the org switcher badge and may influence certain UI highlights within the workspace.
Saving
Click “Save changes” to persist name, icon, and color updates.
Members tab
The Members tab lists every user who belongs to the organization. Each row shows:
- Avatar and display name
- Email address
- Role badge — Owner, Admin, Member, or Viewer
Roles
| Role | Permissions |
|---|---|
| Owner | Full access — can change all settings, manage members, delete the org |
| Admin | Can manage members and most settings, cannot delete the org or change Owner role |
| Member | Standard access — can use agents, create chats, manage own resources |
| Viewer | Read-only access to the workspace |
Owners can change a member’s role using the role dropdown on each row, and can remove members with the remove button. Role changes open a confirmation dialog summarizing what the new role can do.
Only one user can hold the Owner role at a time. Transferring ownership (assigning the Owner role to another member) is a guarded, irreversible action: you must type the target member’s email to confirm, and once it completes the previous owner is automatically demoted to Admin. An owner cannot leave the organization or have their role changed until they transfer ownership to someone else first.
Groups tab (admins)
Permission groups let admins hand specific users a restricted, capped workspace. A user assigned to one or more groups is limited to the union of those groups’ grants. Users with no group keep full access for their role, and Owners and Admins always bypass groups. Only Members and Viewers can be restricted.
Each group has four parts:
Permissions
A per-section View / Manage matrix. Each functional area exposes two keys — <area>.view (open the section and read its resources) and <area>.manage (create, update, delete) — and granting Manage implies View. The areas are:
Agents, Personas, Skills, Tools, MCP Servers, Knowledge Bases, Memory, Projects, Tasks, Issues, Proposals, Approvals, Schedules, Channels, Providers, Integrations, Marketplace, Webhooks, and Settings.
Sidebar sections a user has no View grant for are hidden from them. Two special toggles sit alongside the matrix:
- Allow advanced UI mode (
ui.advanced_mode) — controls whether the group’s users can leave the simple interface. Unchecked forces simple mode. - View shared conversations (
chats.view_shared) — when granted, a restricted member sees every member’s conversations in the shared org chat list; without it they see only their own. Owners and admins always see shared chats.
Defaults without a group: a member with no group keeps full access for their role, and a viewer with no group gets read-only (view) access to everything except Settings. Assigning either to a group switches them to the union of that group’s grants instead.
Usage limits
Per-user caps for everyone in the group (0 = unlimited):
| Limit | Effect |
|---|---|
| Token budget | Cap on input + output tokens consumed |
| Budget window (hours) | Rolling window for the token budget; 0 = total / lifetime |
| Max concurrent agents | How many agent runs the user can have in flight at once |
| Max provider accounts | How many provider accounts the user may use |
Enforcement is live: the turn that crosses the token budget finishes, and the user’s next turn is blocked until the window rolls over.
Capabilities
Allowlists that narrow what a user can pick — Agents, Skills, Tools, Personas, Providers, and Chains — plus a forced default chain. Leave a list empty to allow everything in that category; add entries to restrict the group to exactly those items.
Assigned users
The members and viewers this group applies to. A user can be in several groups; their effective policy is the union.
Groups are the org-level equivalent of RBAC plus quotas. To cap a single person, put them in their own group. To give a whole team read-only agents with a monthly token budget, one group with the right permissions + a 720-hour window covers it.
For the underlying REST endpoints (/api/permissions/*), the full permission-key catalog, and the multi-group merge rules, see the Organizations API reference.
Invites tab
The Invites tab is the primary way to add new users to the organization. Invites work by generating a link you copy and share yourself — Nexora does not send invitation emails.
Generate an invite link
Click “Generate invite link” to mint a combined sign-up + join URL (/register?invite=…&join=…) for new users. For people who already have a Nexora account, “Generate org invite link” mints a /join?token=… URL instead.
Copy and share the link
Click the Copy button next to the generated link and send it to the invitee through your own channel (chat, email, etc.).
Invitee accepts
When the recipient opens the link and completes registration (or, for existing users, confirms the join), they are added as a Member of your organization.
New teammates become managed accounts. A person who registers through an organization invite is created as a managed user — scoped to your org, with no personal workspace and no organization switcher. They cannot create, join, or leave other orgs. Existing users who accept a /join link keep their own account and are unaffected. See Managed accounts.
Invite to the terminal (CLI)
For teammates who work from the command line, generate a terminal invite: enter their email (and optional name) and Nexora produces a single copy-paste command for macOS/Linux and Windows. Running it installs NexoraCLI, creates their account in this org, and pairs their terminal — no manual login or device pairing.
curl -fsSL https://raw.githubusercontent.com/ParendumOU/Nexora-CLI/main/install.sh | bash -s -- --join <INVITE_TOKEN> --url https://your-instanceThe command is single-use and expires in 7 days, the same as a link invite. See the CLI Install & Connect → Zero-touch join guide for the invitee’s side.
If your instance is configured with REQUIRE_INVITE=false, users can register without an invite. In that mode, the Invites tab still functions for proactively inviting specific users, but open registration is permitted. NexoraCloud instances default to REQUIRE_INVITE=true, which means all new users must be invited.
Multiple organizations
A single Nexora user account can belong to multiple organizations. All agents, chats, projects, skills, tools, and personas are scoped to a specific organization — switching orgs changes the entire workspace context.
To switch organizations, click the org switcher at the top of the sidebar. A dropdown lists every organization you belong to. Clicking one switches the active workspace immediately.
To create a new organization, click “Create organization” at the bottom of the org switcher dropdown. You will be the Owner of any organization you create.
Managed users are the exception. A user who joined through an organization invite is locked to that single org — the org switcher shows a static label instead of a dropdown, and the “Create organization” action is unavailable. See Managed accounts.