Profile & Organization
Nexora exposes two separate settings areas for personal and organizational configuration. The Profile page (/profile) manages everything that belongs to you as an individual user. The Organization page (/org) manages the shared workspace that all members of your org interact with.
Profile page (/profile)

The profile page is divided into seven tabs:
| Tab | Purpose |
|---|---|
| Profile | Display name, avatar emoji, email, and Telegram linking |
| Interface | UI preferences such as theme and layout |
| AI Memory | Personal context fed into agent system prompts |
| Contact Info | Additional contact details attached to your account |
| Security | Password change and TOTP two-factor authentication |
| API Keys | Personal API keys for programmatic access to Nexora |
| Backup | Export your account data |
Profile tab
The Profile tab controls your visible identity within Nexora.
Avatar
Your avatar is an emoji, not an image upload. The picker presents:
- A text input labeled “Paste any emoji…” — paste or type any Unicode emoji directly
- A preset grid of common emojis (😎 🚀 💡 🔥 ⚡ and others) for one-click selection
The selected emoji appears wherever your name is shown in the interface — in chat history, agent logs, and organization member lists.
Display name
An editable text field for your full name as it appears to other organization members and in chat attribution.
Your email address is shown as a read-only field. Email changes are not self-service — contact your organization owner if your email needs to be updated.
Telegram
The Telegram field shows:
“Not linked — send a message to the Nexora bot on Telegram and your profile will auto-connect.”
When you send any message to the configured Nexora Telegram bot, the platform automatically matches your Telegram account to your Nexora profile. No token copying or manual linking step is required. Once linked, the field updates to show your Telegram username.
Telegram auto-connect works by matching the account that messages the bot against registered Nexora user emails. If auto-connect does not fire, confirm that the email on your Telegram account matches the email on your Nexora profile, or ask your admin to check the channel configuration.
Saving
Click “Save profile” to persist any changes to display name or avatar. The save button is at the bottom of the tab content.
Interface tab
The Interface tab controls how Nexora presents itself to you. Your choice is saved per device — switching on one machine does not affect other devices or other users.
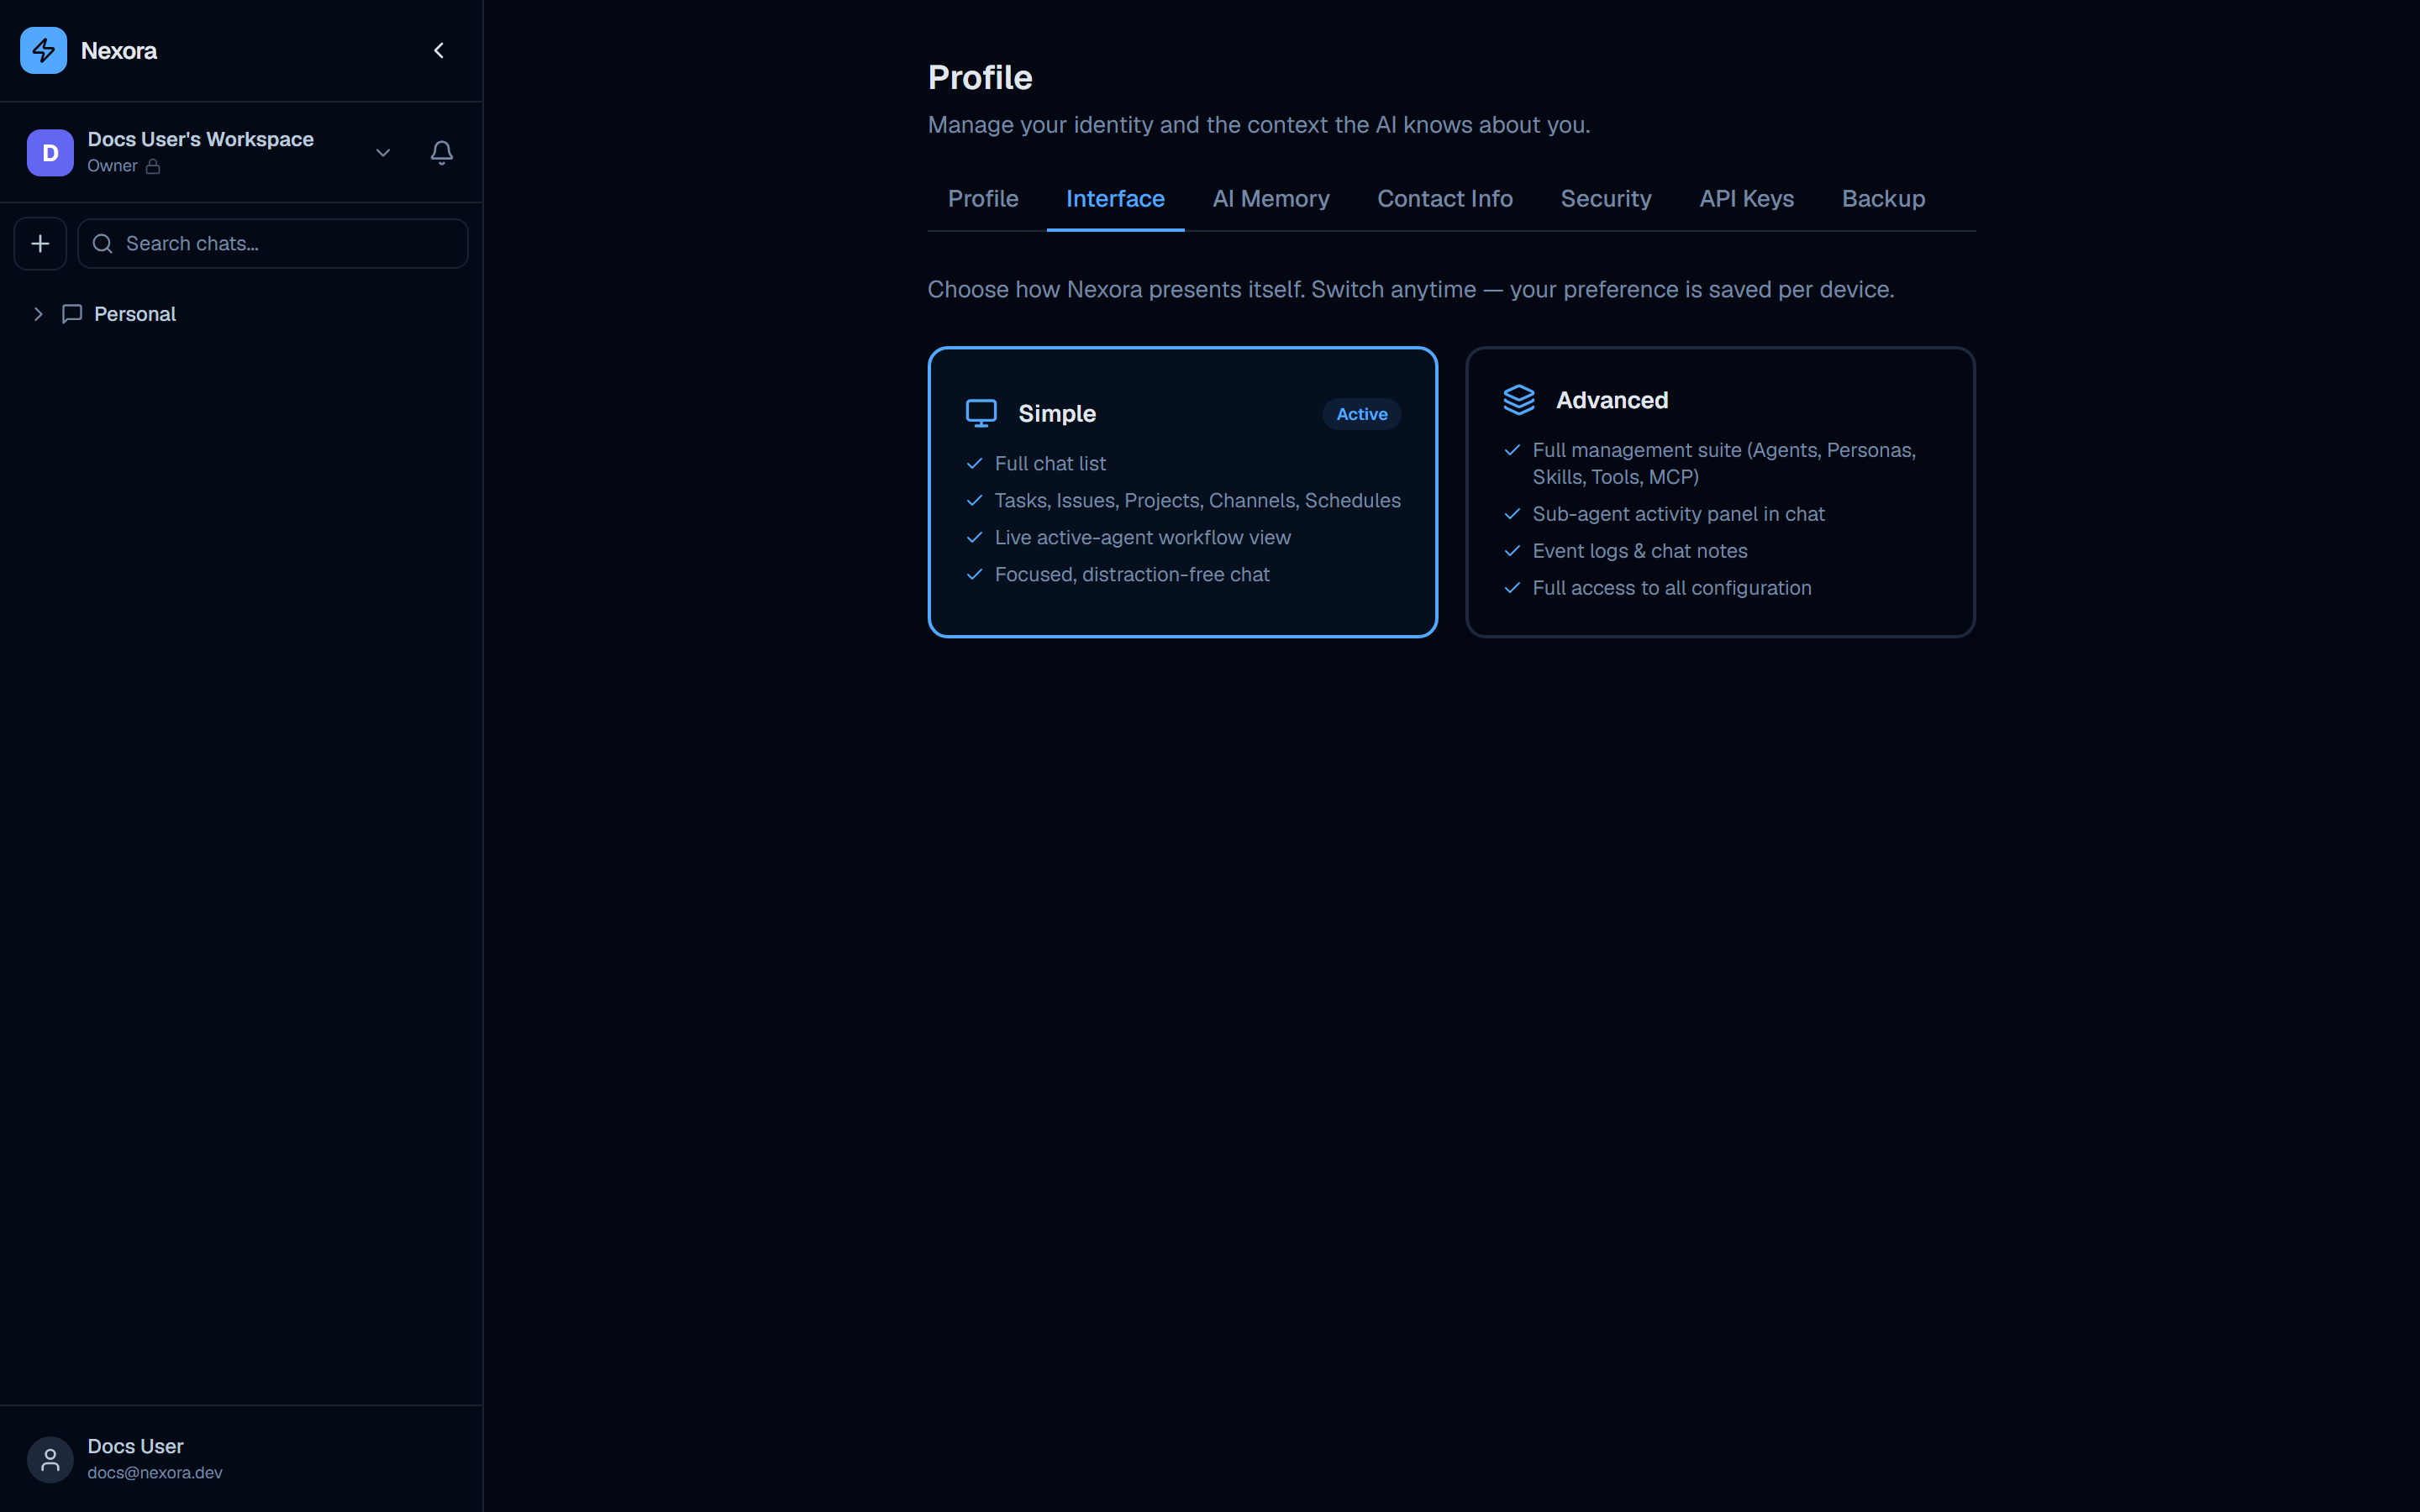
Simple mode
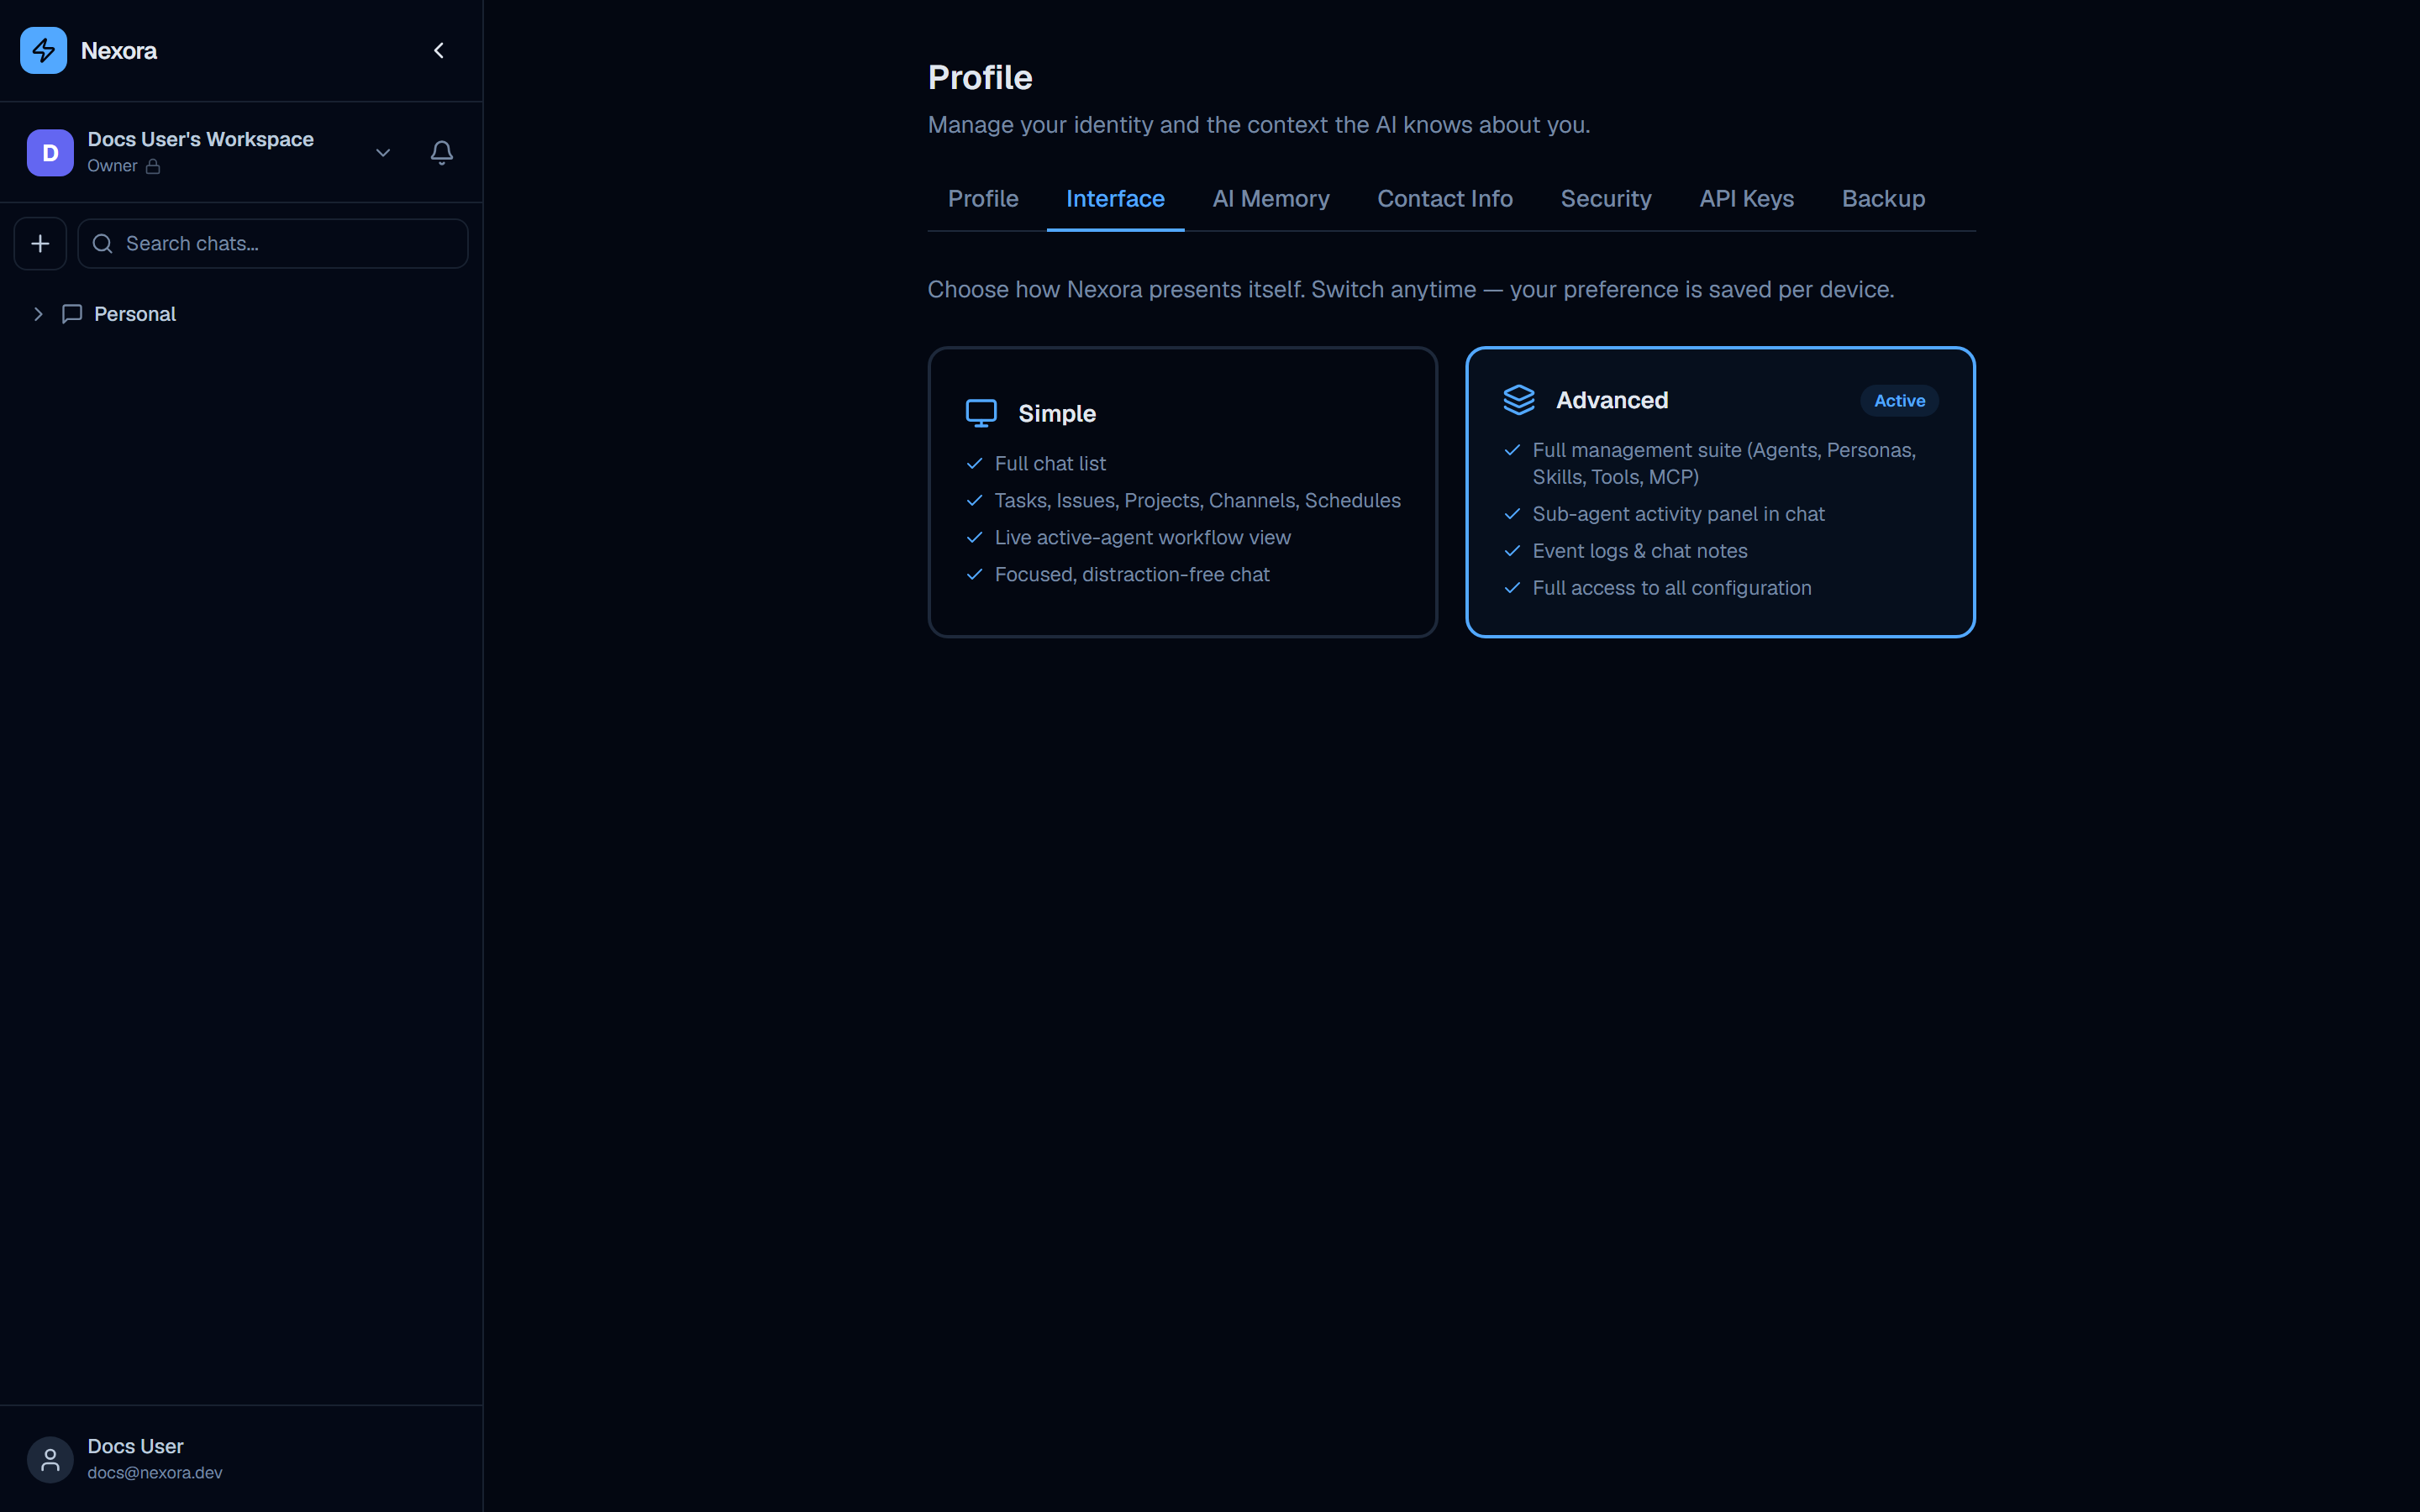
Nexora offers two UI modes:
| Mode | What it includes |
|---|---|
| Simple | Full chat list · Tasks, Issues, Projects, Channels, Schedules · Live active-agent workflow view · Focused, distraction-free chat |
| Advanced | Full management suite (Agents, Personas, Skills, Tools, MCP) · Sub-agent activity panel in chat · Event logs & chat notes · Full access to all configuration |
Simple mode is designed for users who primarily interact with agents through chat — project managers, product owners, or anyone who uses Nexora to get work done without needing to configure the platform.
Advanced mode exposes the full technical surface: the Agents builder, Personas library, Skills catalog, Tools library, and MCP server management. Use this when you are building or modifying agents, debugging sub-agent orchestration, or administering the platform.
Click either card to switch modes immediately. The change takes effect without a page reload.
AI Memory tab
AI Memory stores personal context that is automatically injected into agent system prompts when you start a conversation. Use it to tell agents things about yourself that are always relevant:
- Your preferred programming languages and frameworks
- Code style preferences (e.g. “I prefer functional patterns over OOP”)
- Working context (e.g. “I am the lead engineer on the Nexora backend team”)
- Communication preferences (e.g. “Be concise, skip preamble”)
Memory entries are plain text notes. Add as many as needed. Agents read this context at the start of every session — you do not need to repeat yourself in each chat.
AI Memory is personal — other users in your organization do not see your memory entries. For shared agent context (e.g. “our stack is Next.js + FastAPI”), use a Persona assigned to the agent instead.
Contact Info tab
The Contact Info tab holds additional contact details associated with your account — useful for organizations that use Nexora to track internal contact information alongside agent work. Fields vary by deployment configuration.
Security tab
The Security tab has two sections:
Change password
A standard password-change form with three fields:
- Current password
- New password
- Confirm new password
Submit the form to update your password. Password strength requirements are enforced by the platform.
Two-factor authentication (TOTP)
Nexora supports TOTP-based 2FA (compatible with any authenticator app — Google Authenticator, Authy, 1Password, etc.).
Open Security tab
Navigate to /profile and click the Security tab.
Enable 2FA
Click “Enable two-factor authentication”. A QR code and a manual entry key are displayed.
Scan with your authenticator app
Open your authenticator app and scan the QR code, or manually enter the key. A 6-digit code will begin rotating every 30 seconds.
Confirm setup
Enter the current 6-digit code from your app into the confirmation field and click “Verify”. 2FA is now active on your account.
Sign in with 2FA
On future logins, after entering your email and password, you will be prompted to enter the current 6-digit code from your authenticator app before access is granted.
To disable 2FA, return to the Security tab and click “Disable two-factor authentication”. You will be asked to confirm your current password.
API Keys tab
The API Keys tab lets you create personal API keys for programmatic access to the Nexora API.
Each key has:
- A name you assign (e.g. “CI pipeline”, “local dev script”)
- A creation date
- A revoke button to invalidate the key immediately
API keys are shown in full only once — at creation time. Copy and store the key securely before closing the creation dialog. If you lose a key, revoke it and create a new one.
API keys authenticate as your user account and inherit your organization membership and role permissions. They are suitable for scripts, CI/CD pipelines, and integrations that need to interact with the Nexora API on your behalf.
Backup tab
The Backup tab provides an export of your personal account data — chat history, profile settings, and AI memory entries. Use this to retain a copy of your data or to migrate between Nexora instances.
Organization page (/org)
The organization page (/org) is accessible to all members but editable only by Owners and Admins. It has three tabs:
| Tab | Purpose |
|---|---|
| General | Organization name, icon, and accent color |
| Members | View and manage current members and their roles |
| Invites | Send invitations and manage pending invite links |
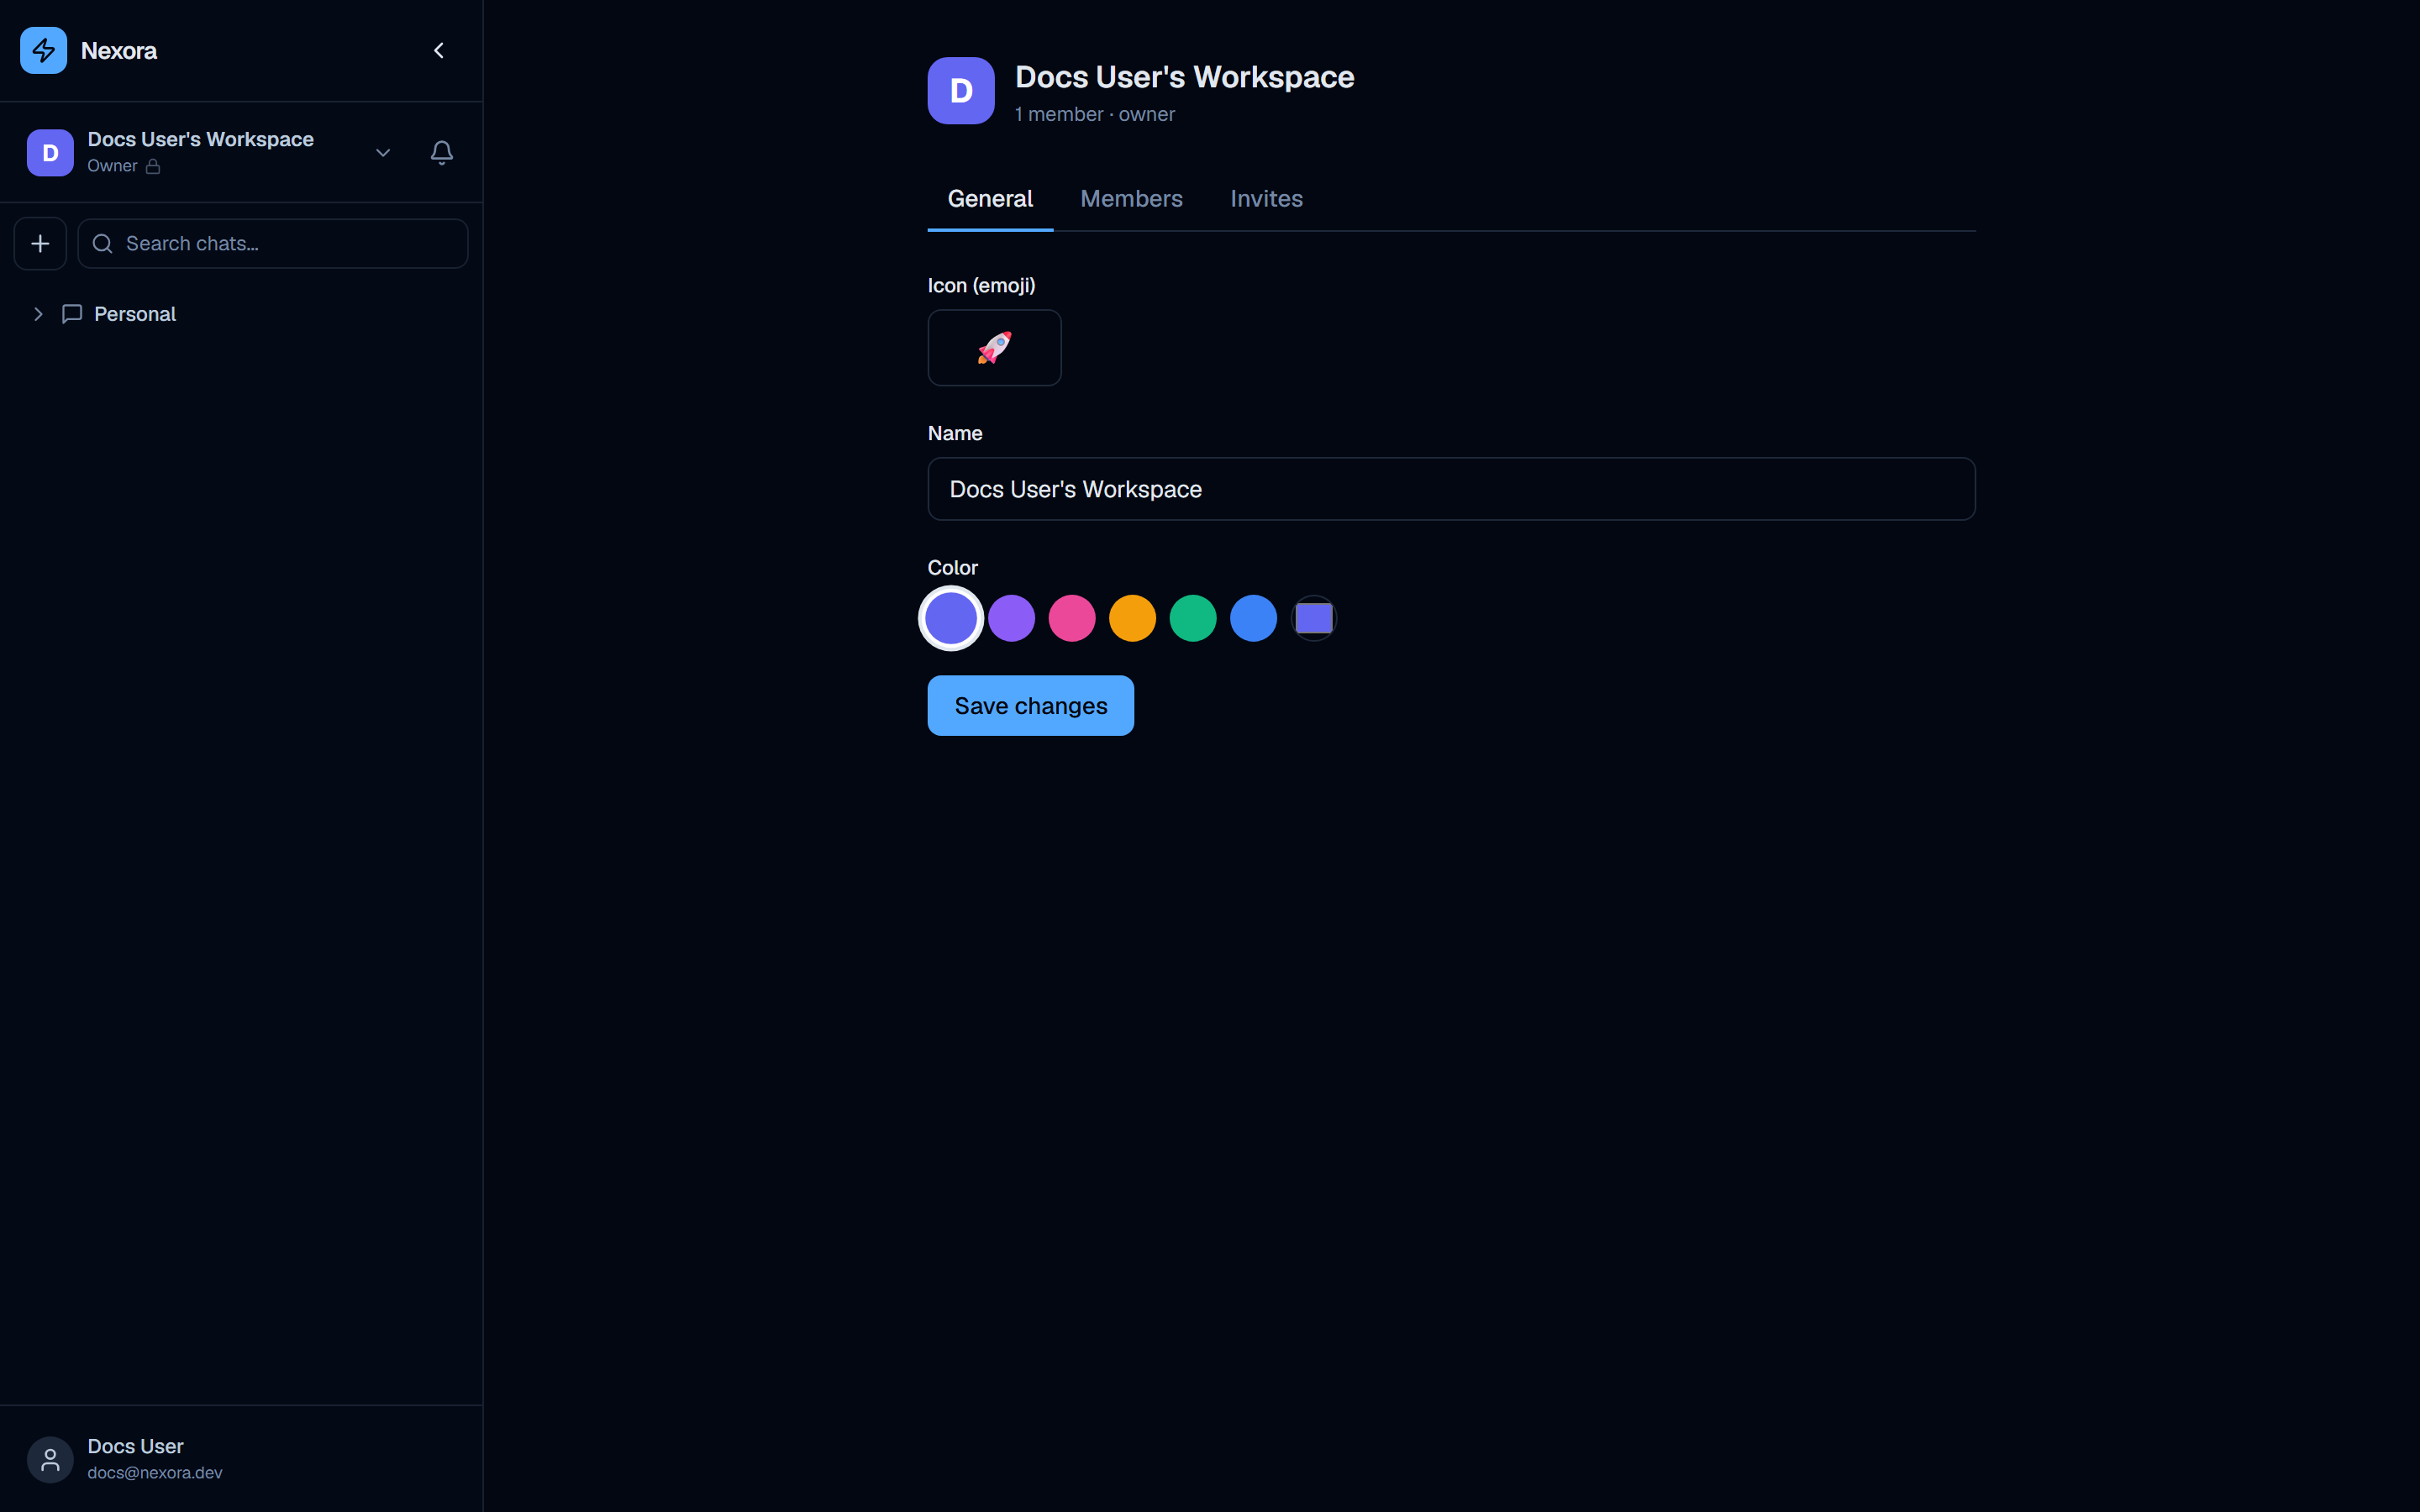
General tab
Organization icon
Like the user avatar, the organization icon is an emoji. The screenshot shows the rocket emoji (🚀). Click the emoji picker to change it. The org icon appears in the sidebar org switcher and on team-facing surfaces.
Organization name
An editable text field showing the current name (e.g. “Docs User’s Workspace”). This name appears in the org switcher dropdown and in shared contexts visible to all members.
Accent color
Seven color swatches let you pick an accent color for the organization:
| Swatch | Description |
|---|---|
| White | Default / no accent |
| Purple | Deep violet |
| Pink | Hot pink |
| Yellow | Amber |
| Green | Emerald |
| Blue | Nexora blue |
| Custom | Hex color input |
The accent color is used in the org switcher badge and may influence certain UI highlights within the workspace.
Saving
Click “Save changes” to persist name, icon, and color updates.
Members tab
The Members tab lists every user who belongs to the organization. Each row shows:
- Avatar and display name
- Email address
- Role badge — Owner, Admin, or Member
Roles
| Role | Permissions |
|---|---|
| Owner | Full access — can change all settings, manage members, delete the org |
| Admin | Can manage members and most settings, cannot delete the org or change Owner role |
| Member | Standard access — can use agents, create chats, manage own resources |
Owners can change a member’s role using the role dropdown on each row, and can remove members with the remove button. Only one user can hold the Owner role at a time — transferring ownership reassigns it.
Invites tab
The Invites tab is the primary way to add new users to the organization.
Enter the invitee’s email
Type the email address of the person you want to invite in the email field.
Send the invitation
Click “Send invite”. Nexora sends an email to that address with a sign-up link tied to your organization. The invite appears in the pending invites list.
Invitee accepts
When the recipient clicks the link in their email and completes registration, they are automatically added as a Member of your organization.
Manage pending invites
Pending invites are listed with the email address and the date sent. Click “Revoke” on any invite to invalidate it before it is accepted.
If your instance is configured with REQUIRE_INVITE=false, users can register without an invite. In that mode, the Invites tab still functions for proactively inviting specific users, but open registration is permitted. NexoraCloud instances default to REQUIRE_INVITE=true, which means all new users must be invited.
Multiple organizations
A single Nexora user account can belong to multiple organizations. All agents, chats, projects, skills, tools, and personas are scoped to a specific organization — switching orgs changes the entire workspace context.
To switch organizations, click the org switcher at the top of the sidebar. A dropdown lists every organization you belong to. Clicking one switches the active workspace immediately.
To create a new organization, click “Create organization” at the bottom of the org switcher dropdown. You will be the Owner of any organization you create.